Showing posts with label Makeover Mondays. Show all posts

Monday, July 30, 2012

Makeover Monday: A Box Turned House


This Monday we decided to makeover a box.  I know houses out of boxes are pretty standard, but I'm pretty happy with the little porch we were able to make for our house.  This was a bathroom vanity box and in it were these nice thick pieces of cardboard with supports in just the right place to make them hold a 90 degree angle very nicely.  We used them to create the roof for the house and porch and then I had saved some of the nice thick rolls that you get when you purchase the fabric that has to be ordered.  


I planned to spend time painting it a pretty pink color with my daughter one afternoon, but before we got to that, she wanted to "decorate" it.  The decoration process turned into a week long, multiple friend project and it was so fun to see all their ideas come to life. I just left the craft supplies out for a week (until they started making their way into other rooms) and let the kids decorate whenever they got the inclination.  8 kids worked on decorating this bad boy and I think it's just fantastic!


We plan to finish the mailbox, number plate, and flower boxes in the near future. 

Getting Crafty!

Molly


Monday, July 23, 2012

Makeover Mondays: Bi Fold-Shutter Doors Turn Sofa Table

Do you see the Bi-Fold Shutter Door behind the china cabinet?  They were there when we moved in to separate the dining room from the family room.  What you may not notice is that underneath the 70s shades in the family room there is a huge window that, when uncovered, brings in a lot of light and makes the house look so much bigger as you can see out to the back yard when you walk in our front door.  This is one of my favorite features of our house and I certainly didn't want to block it off with bi-fold doors - maybe french doors at some point, but for now I love it just being open. So we had these shutters and I thought surely there is a project we can make with these doors. 

I remembered that Nate Berkus said that if you have the back of a sofa to the part of a room you walk into, you should have a sofa table behind it so that the first thing you see when you enter the room isn't the back of a couch.  Well, not only is my sofa back exposed when you walk in the room, it's the first room when you walk in the front door, so it definitely needed my attention. 


I searched pinterest for projects with shutters and found this fabulous sofa table made out of shutters! Awesome, I'm going to get a sofa table and use the shutters at the same time and spend $0! Love it.  I'm not a woodworker, but my husband and father in law are, so they cut the shutter down to size added a little trim to the bottom and 4 legs added a little paint, and look what we have...


 In the future, I might have a piece of glass cut to sit in the insert where the slats are to make it a completely flat surface, but for now it works great.


Opening Doorways!

Molly

Monday, July 16, 2012

Makeover Mondays: Jazzing up an old brass chandelier

When we moved into our new home, we didn't have a big light fixture budget so we replaced the fixtures that just plain needed replacing and worked with others.  Here is a picture of the dining room as it was when we did our walk through.  Notice the brass chandelier...not my favorite.  In fact, I pride myself in seeing an item's potential, but this I really didn't see, it was my husband who said, "Aren't we just going to paint this black?" And I still questioned whether I'd like it, but he was absolutely right.


Here it is when we were in the process of ripping up carpet and painting. 


And here it is redone.  A quick coat of black spray paint and some new shades and it is as good as new.


At first my husband's sister loaned us some black lamp shades, but since the dining room is the only room in our house without windows it gets pretty dark.  I checked out the little shades at Home Depot and Lowes and decided I didn't want to spend that much money unless I got a new light fixture all together.  So, I kept my eyes open and one day while I was out yard saling, I found this fantastic, like new set of golden tan lamp shades for $4 (for the set)! Big score.  Now our dining room is much brighter than it was with the black shades and much prettier than it was with the brass and glass fixture!


Turns out I really like this chandelier after all!


Lighting the Dark Corners!

Molly

Monday, July 9, 2012

Makeover Mondays: Window's Aren't Just for Looking Through

When we got new windows a few years back, I asked them to save the old windows because I had some projects in mind. When I returned home I found, to my dismay, that they saved all the exterior aluminum windows and took the nice wooden frame windows. Ugh. Do you hear my excited heart deflating? I sure did. Thankfully my mother-in-law  was able to salvage one window for me. 

For this project, I cut 8 pieces of paper 4"x6" and taped them onto the window panes where I wanted the pictures to be.  I then sprayed the window with a glass frosting spray paint.  This allowed the window to still be translucent but not 100% transparent. I did this so that I could use tiny pieces of tape to attach the pictures and the frost would cover enough so you don't see the tape. 


Then I opened up the pictures on the computer and played with the contrast and color saturation to make them fun, playful colors and had them printed at Walgreens. 

To hang the window I had my husband or his father (can't remember who did it) drill holes in the back.  They have a jig that makes that keyhole type hole so that the screw or nail fits in the bottom of the hole and slides up to the top (not sure what that's called).

We used this method to make sure it was securely fastened to the wall because we hung it over the crib and it is heavy.  We didn't want her to be able to pull on it enough to get it to fall on her.  We also pre-drilled our holes and used plastic anchors to help make it super sturdy. 


Not too long ago as I was driving home, I saw this little window sitting by the curb...score! I think it looks pretty just hanging there and would look nice painted an accent color as well.  However I have another idea that I will share in a future post. 

Turning Trash into Treasure,

Molly


Monday, July 2, 2012

Makeover Mondays: Office Chair turned Side Chair

I love how Nate Berkus can take something hideous and turn it into something beautifully modern and fresh.  This project was inspired by his show.  He's always talking about getting chairs at a yard sale and painting and reupholstering them.  So, I thought I needed to give it a try. 

We just moved into our home last summer and it's nearly 50% larger than our first home.  At any rate, we went from one sitting room to two and our budget doesn't accommodate buying new furniture.  So, I combed craigslist for weeks waiting to find the right set of chairs for our living room.  And, wouldn't you know it, some wonderful woman posted these ugly office chairs for free. 

Convincing my husband to drive across town to pick them up and that they would actually be comfortable and nice looking when I was done was the hardest part of this project :)  But, he's smart, so he finally agreed to go get them. 

Here's what we picked up.


Not so bad, two of these office chairs, a little dirty, a little ugly, but they have potential. 

I immediately started taking out staples and screws. While I did this, I wrote down what I did so that I could redo it in reverse order.  It's also a great idea to take pictures of each step to help if you get stuck on a particular step. When I had all the fabric off, I gave the wooden frames to my husband to sand and paint.  I went to the fabric store and purchased fabric and 1" foam to make the seat a little more cushy. 

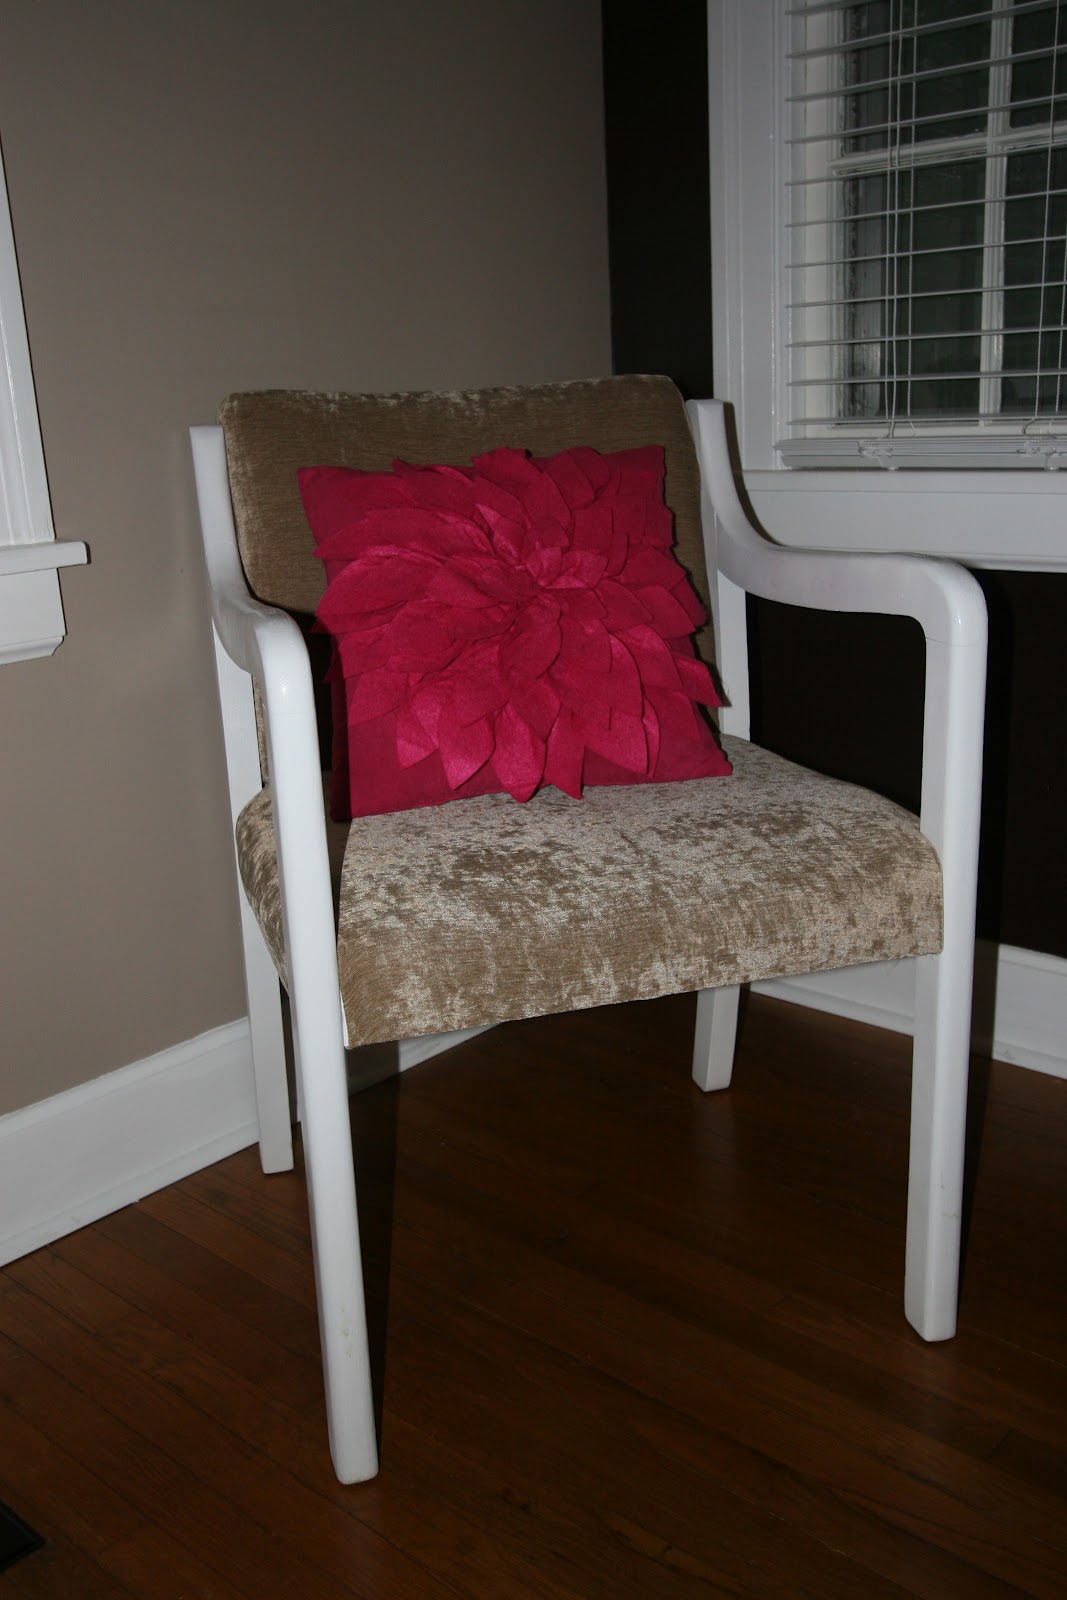
I sewed the part that needed sewing and then my husband and I stapled and screwed them back together.  Here's what the finished product turned out like. 


Pretty nice set of side chairs for $15 a piece!


Decorating on a Dime,

Molly

Monday, June 25, 2012

Makeover Mondays: Baby Swing!

Welcome, once again to Makeover Mondays where I focus on upcycling.  Today I want to share one of my favorite makeovers...drum roll please...an upcycled baby swing.

We were so generously given a baby swing from some dear friends when we had our first daughter.  They had purchased it for their first son who is at least 13 now...so as you can imagine it's slightly outdated.  It works fantastic and being the frugal person that I am, I didn't want to buy a new one. 

As I was thumbing through some pins on pinterest, I found what is now one of my all time favorite blogs, Make It - Love It.  On this site I found an amazingly detailed tutorial on recovering a car seat and a high chair.  I used the concept to recover my swing - I actually did a car seat and am in process of recovering my high chair as well.  It looks so amazingly better and it was super simple...much more simple than it looks.  My swing is now much more up-to-date and girly! 

Check out these before pictures


This is the original cover for the swing.


Here's a picture of my first daughter in the swing 4 1/2 years ago.

And, after 2 naps, the swing was transformed into this...

 This is my second daughter in the swing a month or two ago. 

And the sweet girl happens to be sleeping in the swing (her favorite place on the planet) right now so I can't get a great picture of the swing until later...I'll post a better picture of the finished product when the swing is available for a photo-op :)


Making the world prettier one swing at a time,

Molly


Monday, June 18, 2012

Makeover Mondays: Painted Vases

This project was definitely inspired by Pinterest.  I found this great tutorial on painting vases here.  This is especially great if you want to use the vases for flowers or want to wash them. 

I needed something for my fireplace mantel and have no plans to use them for flowers or to wash them (besides a quick dust or rinse).  I am also on a tight budget and this project fit the budget.  I purchased some of the vases at the Dollar Tree and some were vases I already had.  Rather than go through all the steps in the tutorial on Sugar and Charm I simply poured a small amount of paint (which I had leftover from other projects) into each vase and rolled them until they were coated (on the inside) with paint.  I poured the excess paint back into the paint can and then set them upright to dry. 

As the vases dried, some paint pooled at the bottom, but it's not very noticable and since I'm not using them for anything other than decorations I'm okay with think paint on the bottom.  If you want to use your vases for flowers, don't paint them the way I did, look at the tutorial on Sugar and Charm. 


So quick and easy!


Paint it new!

Molly

Monday, June 11, 2012

Makeover Monday: Plastic Bag Container & Snack Container (Recycled)

Do you ever feel like you have plastic bags coming out of your ears?  I certainly do.  We use reusable shopping bags but even so, there are times we forget them and those little plastic bags accumulate quickly.  I use them for our small trash cans in the bedrooms and bathroom.  The only issue is that they are so bulky that I keep them in the basement which isn't very conducive to actually getting the bags in the trash cans before something gets thrown in them. 

In addition, I go through a lot of creamer and recycle the containers, but I wondered how I might reuse them. 

I saw something similar to this on Pinterest and thought I'd give it a try.  I wanted to make them pretty, so I used an idea from Little Birdie Secrets when she made labels for soap dispensers. 

Here are the original containers...


I took the label off the coffee creamer container and then printed up some new labels.


I attached the labels with mailing tape to make the labels waterproof for washing. I like that the snack container has my girls' names on it so that I can bring it to the nursery at church and they won't wonder who it belongs to.


I like the black and white with the red Folgers can.


Cut a + in the top of the coffee can.


Here's the +


And, see how bulky these bags are?


Guess what, all neatly stored in this container.  Cute and Space Saving...win, win. 


Now I have bags right in the bathroom vanity so it's super quick and easy to change the "trash bag" on trash days :)

Another use for the creamer container, wash one out and use it to store homemade salad dressing - nice easy pour spout. 

Note: I just emptied a Tum's container (actually my husband did - anyone know how to cure heartburn naturally?) and decided it would make a great snack container as well.  It's a bit smaller in size, so it's a good snack size and it has a larger mouth so the square pretzels that I buy will pour out of the lid easily.


Reusing Containers!

Molly

Monday, June 4, 2012

Makeover Monday: A Jeweled-up Onesie

I buy all my older daughter's clothes second hand from a woman I met at a yard sale who has fabulous taste and has a very stylish daughter who is a year older than mine.  This summer, one of her "new" outfits came with an adorable Gap tank covered in printed-on necklaces.  It is my favorite of her summer shirts. 

I've seen many little onsies out there for boys with bow ties and regular ties and wondered what their girly counterpart might be.  When I saw my daughter's new tank top, I knew I wanted to make a similar onsie for my baby girl.  So, I went to Target, bought a pack of fabric markers ($5) which can be used for several projects and started drawing on one of her many plain white onsies.  Here's the finished product.  Not as spectacular as I would like it to look but she's received many compliments, so I guess it can't be that bad :)  I might try another one in a bigger size and see if I can do better next time. 

Without further ado, the Jeweled-up Onsie:


And, here they are in their matching outfits.  My older daughter loves to be "twins!"


Getting Fancy,
Molly

Monday, May 28, 2012

Makeover Mondays: Pillowcase Halter and Doo Rag

Happy Monday! This upcycle project was inspired, again, by a trip to Goodwill.  I promise I don't spend all my time there, but it's a great place to buy inexpensive fabric.  This time I came across these sweet vintage pillowcases.  I decided they would someday make something great, but didn't know what at the time.
After looking at them for some time at home, I decided they had to turn into little girl halter tops and I had the perfect ribbon for the project. 


My daughter (pictured here) is now 4 1/2, so this obviously was created years ago...which means there is no tutorial, but again, if you like to figure things out on your own, hopefully this will inspire you to make a halter top (or perhaps something you dream up) out of a pillowcase :)


At this age, her hair was always getting in her face, but it wasn't quite long enough to pull back.  I would put these little clips in her hair, but as fine as it was, it was always falling out.  So, I decided to make a doo rag with some of the pillowcase fabric I had leftover.  It worked like a charm and I think it was absolutely adorable.


I decided to make it double sided to get more use out of it and so I didn't have to be so careful with the hems.  The green side is an old sheet.


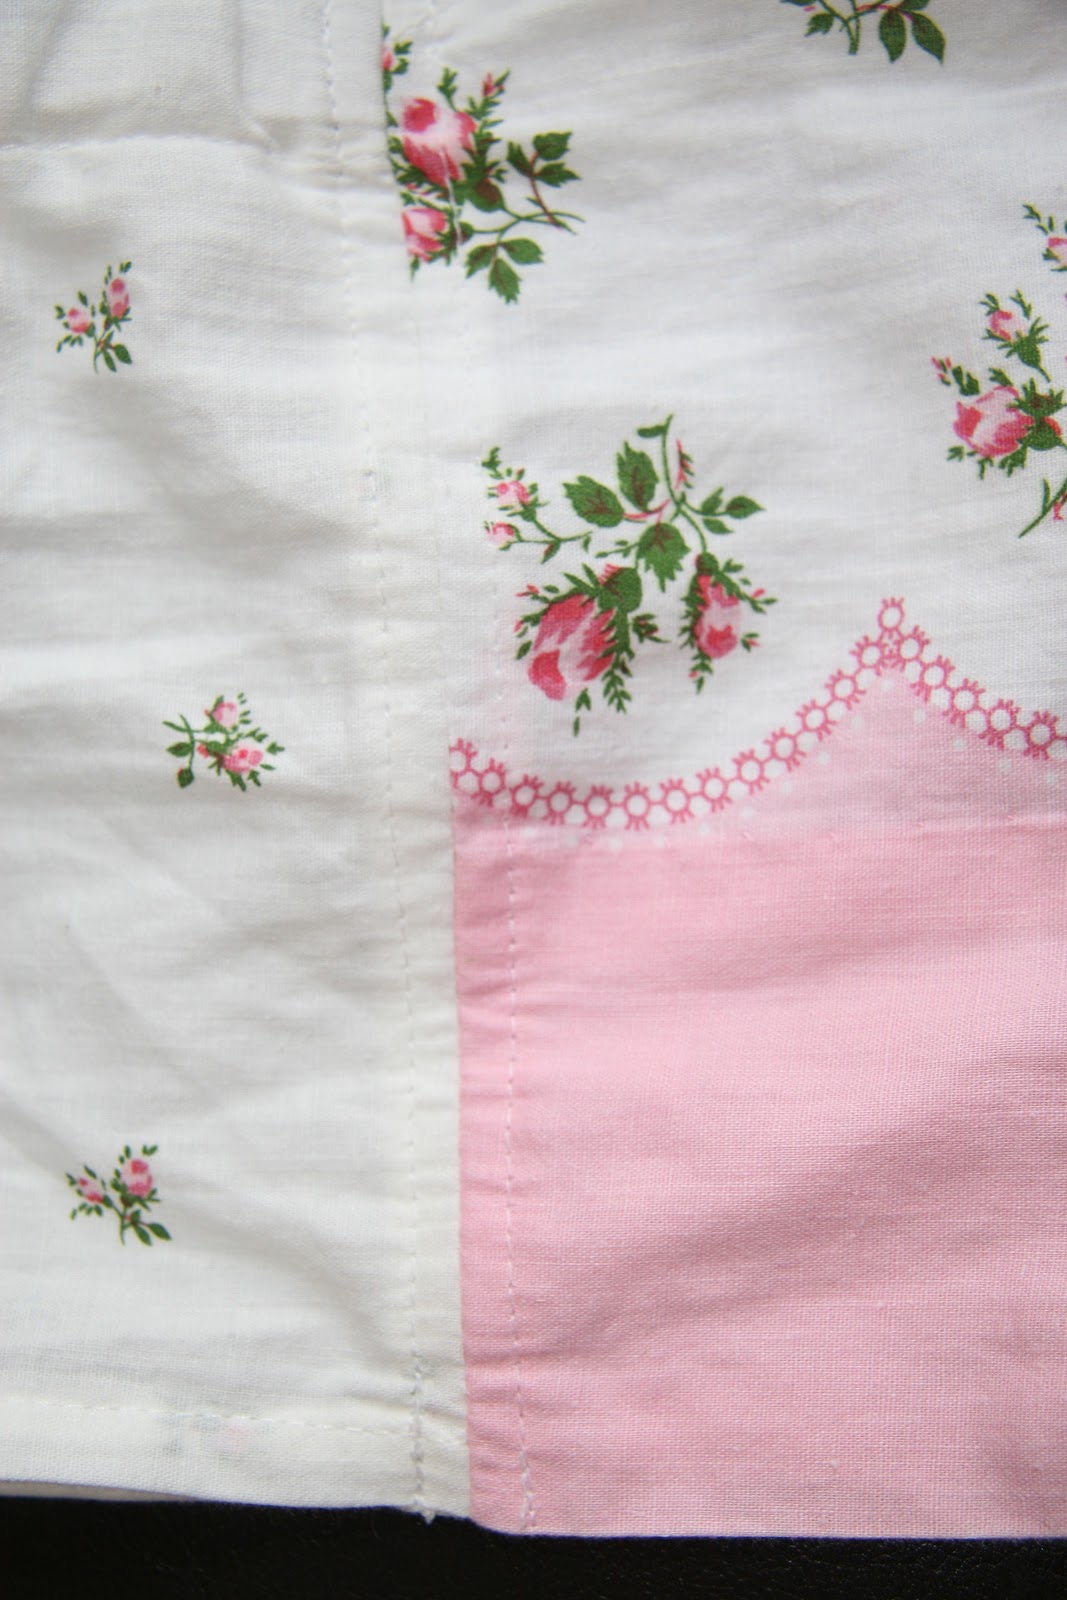
Here are a few more pictures of the hems/seams to give you an idea of what I did.  For the neckline, I'm pretty sure I sewed a few stitches in the center that went through the ribbon to keep it from falling out when it got washed or pulled on.  I sewed some elastic on the top of the back to help it hug her (even though I got it a little too big). 


Happy Sewing!

Molly

Monday, May 21, 2012

The First of Many "Makeover Mondays"

These days everyone is getting into recycling, upcycling, reusing, and using what we have.  In the spirit of upcycling, I am starting a series called "Makeover Mondays" where I will be sharing an idea that takes an old item and gives it an overhaul - a Makeover! 

Today is the first of these makeovers, and I want to share a quick, easy, and inexpensive way to create a paint smock or two for your children.  My daughter loves to paint and in my experience, washable paint is only washable if you wash it immediately.  As a laundry procrastinator, I had to come up with a solution.  So, I created a paint smock that would not allow the paint to bleed through to her shirt. 

I took a trip to Goodwill, found my inspiration - an old vinyl tablecloth! 


I folded the tablecloth in half lengthwise, and cut it in this shape (I just eyeballed it, but you could always fold a halter dress in half lengthwise and lay it on the tablecloth as a guide).  Then I took some contrasting ribbon and made two strips to tie around her neck and two to tie around her back and pinned them in place. 


I then cut enough to sew around the edge of the paint smock (folding it in half lengthwise as I sewed). I used green thread to make it more playful and because I didn't have yellow thread to match the ribbon. And, I was done. 

(My niece reluctantly modeling the smock)

But then I decided it would look cuter with a pocket, so I cut a rectangle, sewed ribbon around the edges and sewed it to the smock on the sides and bottom of the pocket.  I pictured the pocket getting used to hold paint brushes, etc., but I found that it is really just there for looks...in 2 years, it has never been used :)

(My other niece who had been waiting all her life to be asked to model - smile)

My daughter was 2 years old at the time I made this and my niece was 8 - it fit both fine...so I know it will last her at least six years. 

And, a quick picture of the back...


Let the painting begin!

Molly